In this post we will learn Step-by-Step how to install WordPress CMS on CentOS 6 linux operating system. WordPress is a content management system (CMS) based on PHP scripting language and MySQL relational database management system (RDBMS).
WordPress enables a website administrator easily and quickly create, deploy and manage a website without any real knowledge of programming languages like HTML, CSS, PHP, JavaScript or Perl. WordPress is modularly built and enables website administrators quick and easy website design changes and customization with WordPress themes, plugins and widgets. WordPress is powered by a large open source community,WordPress coders, testers and users. Learn how to install WordPress and so you can start blogging too! ..everybody else is doing it! 🙂
Let’s start our Install WordPress on CentOS 6 guide!
1.Install packages
Install WordPress required Packages (Apache, MySQL, PHP,…)
[root@foo ~]# yum install httpd mysql-server php php-mysql wget -y
[root@foo ~]# chkconfig mysqld on
[root@foo ~]# chkconfig httpd on
2. Download WordPress
Download and Untar the latest WordPress
[root@foo ~]# wget http://wordpress.org/latest.tar.gz
[root@foo ~]# tar -xvzf latest.tar.gz
[root@foo ~]# mv wordpress /var/www/html/
[root@foo ~]# chown apache:apache /var/www/html/ -R
3. Configure Apache and WordPress VirtualHost
To Install WordPress we need to configure Apache HTTP server. Echo ServerName and NameVirtualHost to /etc/httpd/conf/httpd.conf (be sure to change ServerName accordingly):
[root@foo ~]# /bin/echo "ServerName foo1.geekpeek.net" >> /etc/httpd/conf/httpd.conf
[root@foo ~]# /bin/echo "NameVirtualHost *:80" >> /etc/httpd/conf/httpd.conf
The content of basic VirtualHost configuration file should be something like this (be sure to change parameters accordingly!):
[root@foo ~]# cat /etc/httpd/conf.d/foo1.conf
<VirtualHost *:80>
ServerAdmin info@geekpeek.net
ServerName foo1.geekpeek1.net
DocumentRoot /var/www/html/wordpress
ErrorLog /var/log/httpd/foo1-error.log
CustomLog /var/log/httpd/foo1-common.log common
</VirtualHost>
Check Apache config for errors and start Apache:
[root@foo ~]# service httpd configtest
Syntax OK
[root@foo ~]# /etc/init.d/httpd start
Starting httpd: [ OK ]
If you have any problems or want additional information on Apache installation, configuration or SSL VirtualHost configuration read my Install Apache Server on CentOS 6 or Apache Configuration on CentOS 6 post!
4. Create MySQL Database and User
To succesfully install WordPress we also need to install and configure MySQL. Start the MySQL daemon for the first time and set MySQL root user password:
[root@foo ~]# /etc/init.d/mysqld start
[root@foo ~]# /usr/bin/mysqladmin -u root password 'HardPass'
Connect to MySQL as root user, Create MySQL database for your WordPress instance, Create WordPress database user and Grant Privileges to that user:
[root@foo ~]# mysql -u root -p
Enter password:
Welcome to the MySQL monitor. Commands end with ; or g.
Your MySQL connection id is 3
Server version: 5.1.69 Source distribution
Copyright (c) 2000, 2013, Oracle and/or its affiliates. All rights reserved.
Oracle is a registered trademark of Oracle Corporation and/or its
affiliates. Other names may be trademarks of their respective
owners.
Type 'help;' or 'h' for help. Type 'c' to clear the current input statement.
mysql> CREATE DATABASE 'foo1' /*!40100 DEFAULT CHARACTER SET utf8 */;
Query OK, 1 row affected (0.00 sec)
mysql> CREATE USER 'wordpress'@'localhost' IDENTIFIED BY 'WordPass';
Query OK, 0 rows affected (0.00 sec)
mysql> GRANT ALL PRIVILEGES ON foo1.* TO 'wordpress'@'localhost';
Query OK, 0 rows affected (0.00 sec)
mysql> FLUSH PRIVILEGES;
Query OK, 0 rows affected (0.00 sec)
mysql> quit
Bye
If you have any problems or want additional information on MySQL installation and additional configuration read my Install MySQL on CentOS 6 or Create MySQL Database and Grant Privileges To User posts!
5. Create and Edit wp-config.php
[root@foo ~]# cp /var/www/html/wordpress/wp-config-sample.php /var/www/html/wordpress/wp-config.php
[root@foo ~]# chown apache:apache /var/www/html/wordpress/wp-config.php
Edit the wp-config.php file and enter the information based upon your configuration:
[root@foo ~]# cat /var/www/html/wordpress/wp-config.php
<?php
 /**
 * The base configurations of the WordPress.
 *
 * This file has the following configurations: MySQL settings, Table Prefix,
 * Secret Keys, WordPress Language, and ABSPATH. You can find more information
 * by visiting {@link http://codex.wordpress.org/Editing_wp-config.php Editing
 * wp-config.php} Codex page. You can get the MySQL settings from your web host.
 *
 * This file is used by the wp-config.php creation script during the
 * installation. You don't have to use the web site, you can just copy this file
 * to "wp-config.php" and fill in the values.
 *
 * @package WordPress
 */
// ** MySQL settings - You can get this info from your web host ** //
/** The name of the database for WordPress */
define('DB_NAME', 'foo1');/** MySQL database username */
define('DB_USER', 'wordpress');/** MySQL database password */
define('DB_PASSWORD', 'WordPass');/** MySQL hostname */
define('DB_HOST', 'localhost');/** Database Charset to use in creating database tables. */
define('DB_CHARSET', 'utf8');/** The Database Collate type. Don't change this if in doubt. */
define('DB_COLLATE', '');........
Be sure to restart Apache:
[root@foo ~]# /etc/init.d/httpd restart
Stopping httpd: [ OK ]
Starting httpd: [ OK ]
6. Finish WordPress configuration
To finish install WordPress on CentOS 6, we need to open your WordPress website from browser and fill in the required information:
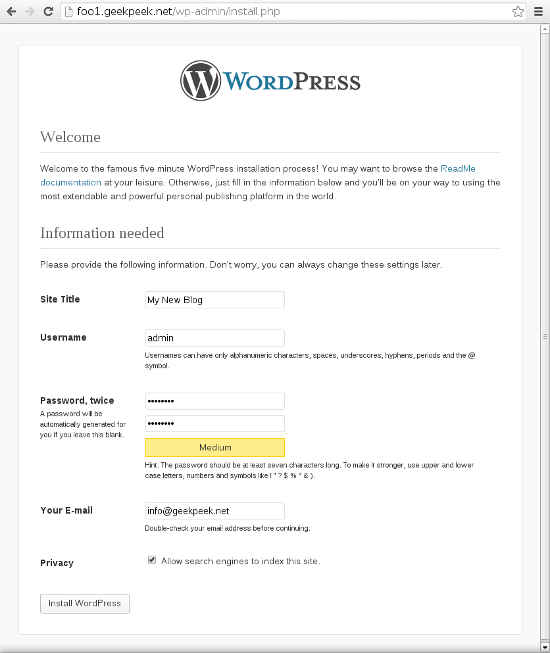
When finished click “Install WordPress” and you will be forwarded to the next window:

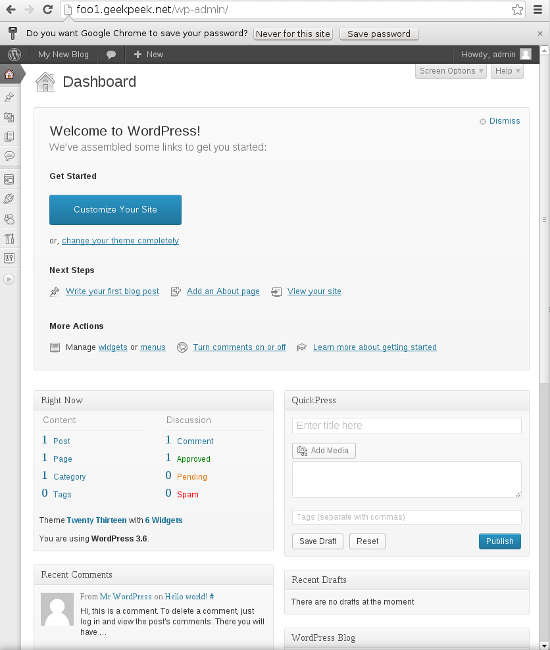
Click “Log in” and enter the WordPress username and password:

After logging in you are in WordPress Dashboard where you can add your posts/content, manage WordPress themes and plugins:
When you are finished re-visit your website URL in browser:
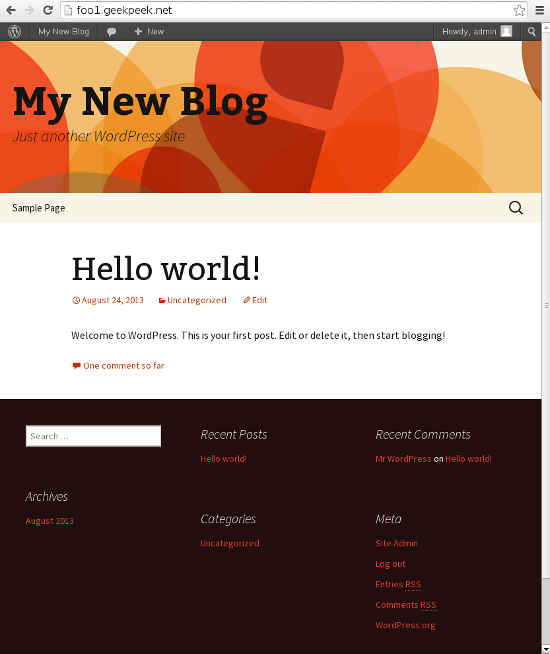
We have finished our install WordPress Step-by-Step guide. Your WordPress instance is up and running and you can start adding content and share your thoughts with the rest of the world.
Enjoy!
Pingback: Install Joomla on CentOS 6 | GeekPeek.Net()
Pingback: Wordpress Centos 6 – Fast VPS()
Pingback: Centos WordPress – SSD Fast & Cheap VPS()