OwnCloud is a free and open-source software which enables you to create a private “file-hosting” cloud. OwnCloud is similar to DropBox service with the diference of being free to download and install on your private server. Advantage of OwnCloud over DropBox is that it is private (you manage it yourself) and not limited (only limited by hard disk capacity of your private server).
OwnCloud also enables you to easily view and sync address book, calendar events, tasks and bookmarks. You can access it via the good looking and easy to use web interface or install OwnCloud client on your Desktop or Laptop machine (supports Linux, Windows and Mac OSX).
This How To was tested on an up-to-date CentOS 6.5 minimal install with IPtables and SELinux disabled!
Let’s Install OwnCloud on CentOS 6!
1. Disable SELinux and IPtables
For this guide SELinux and iptables were disabled and CentOS 6 was fully updated!
2. Install Required Packages
If you are running CentOS 6 minimal install you are probably missing some basic packages. Run following command to install:
[root@centos1 ~]# yum install wget -y
3. Install EPEL and Remi Repository
We need to install the latest EPEL and Remi repository RPM suited to your architecture.
[root@centos1 ~]# rpm -ivh http://mirror.nl.leaseweb.net/epel/6/i386/epel-release-6-8.noarch.rpm
[root@centos1 ~]# rpm -ivh http://rpms.famillecollet.com/enterprise/remi-release-6.rpm
4. Install OpenSUSE OwnCloud Repository
[root@centos1 ~]# cd /etc/yum.repos.d/
[root@centos1 yum.repos.d]# wget http://download.opensuse.org/repositories/isv:ownCloud:community/CentOS_CentOS-6/isv:ownCloud:community.repo
5. Install MySQL
OwnCloud requires a database to hold data. It supports MySQL, MariaDB, SQLite, and PostgreSQL. In order to support multiple user account without any problems we will use OwnCloud with MySQL database.
[root@centos1 ~]# yum install mysql-server -y
6. First Time MySQL Start
[root@centos1 ~]# /etc/init.d/mysqld start
Initializing MySQL database: Installing MySQL system tables...
OK
Filling help tables...
OK

To start mysqld at boot time you have to copy
support-files/mysql.server to the right place for your system

PLEASE REMEMBER TO SET A PASSWORD FOR THE MySQL root USER !
To do so, start the server, then issue the following commands:

/usr/bin/mysqladmin -u root password 'new-password'
/usr/bin/mysqladmin -u root -h centos1.geekpeek.net password 'new-password'

Alternatively you can run:
/usr/bin/mysql_secure_installation

which will also give you the option of removing the test
databases and anonymous user created by default. This is
strongly recommended for production servers.

See the manual for more instructions.

You can start the MySQL daemon with:
cd /usr ; /usr/bin/mysqld_safe &

You can test the MySQL daemon with mysql-test-run.pl
cd /usr/mysql-test ; perl mysql-test-run.pl

Please report any problems with the /usr/bin/mysqlbug script!

                 [ OK ]
Starting mysqld: [ OK ]
7. Set MySQL root Password
[root@centos1 ~]# /usr/bin/mysqladmin -u root password 'geekpeekrootpass'
8. Install OwnCloud and Dependencies
[root@centos1 yum.repos.d]# yum --enablerepo=remi install owncloud mod_ssl -y
9. Create OwnCloud MySQL Database and User
Please read “Create MySQL Database and Grant Privileges to User” post on how to do that. It is very clear and easy to follow. Name the database and user as you wish just remember the details for further OwnCloud installation steps.
Learn How To Create MySQL Database and Grant Privileges to User
10. Start Apache (httpd) Service
[root@centos1 ~]# /etc/init.d/httpd start
11. Start Postfix Service
Postfix or other mail server needs to run on OwnCloud server to enable sending of OwnCloud related emails.
[root@centos1 ~]# /etc/init.d/postfix start
12. Visit OwnCloud URL in Your Browser
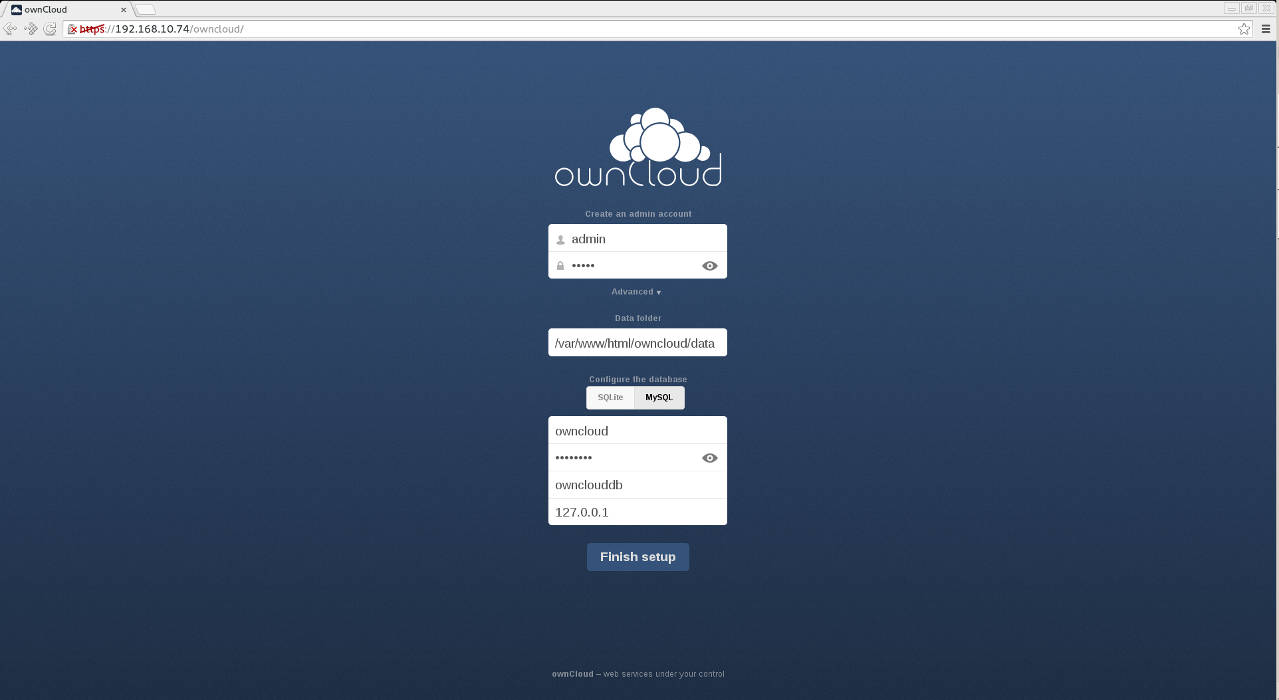
Visit https://your_ip_or_hostname/owncloud with your browser to finish the installation process of OwnCloud. Create an admin account and choose where to store administrative data to MySQL database. Provide the necessary information to connect to MySQL database and click finish.
Voila, we have successfully set up OwnCloud and Welcome message pops up.

In the right upper corner click on “admin” menu and then select “Admin” from drop down. This is where you can configure basic OwnCloud configuration. Please note that this feature is only available to admin user!
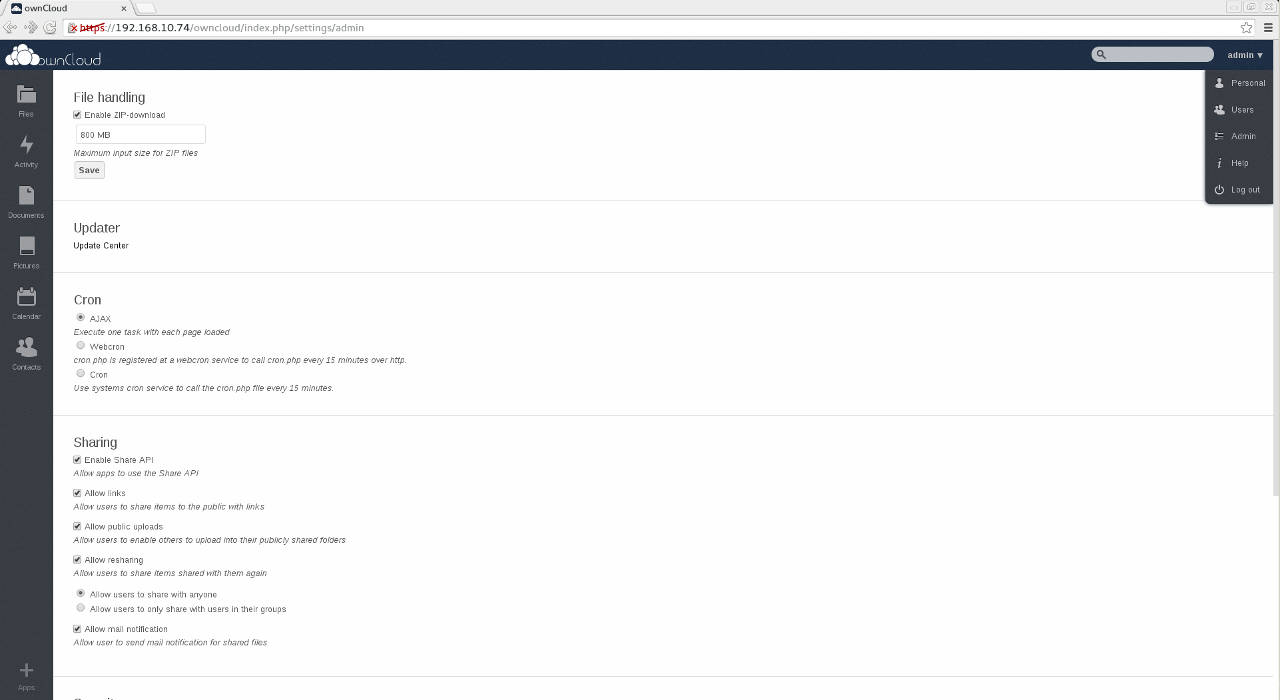
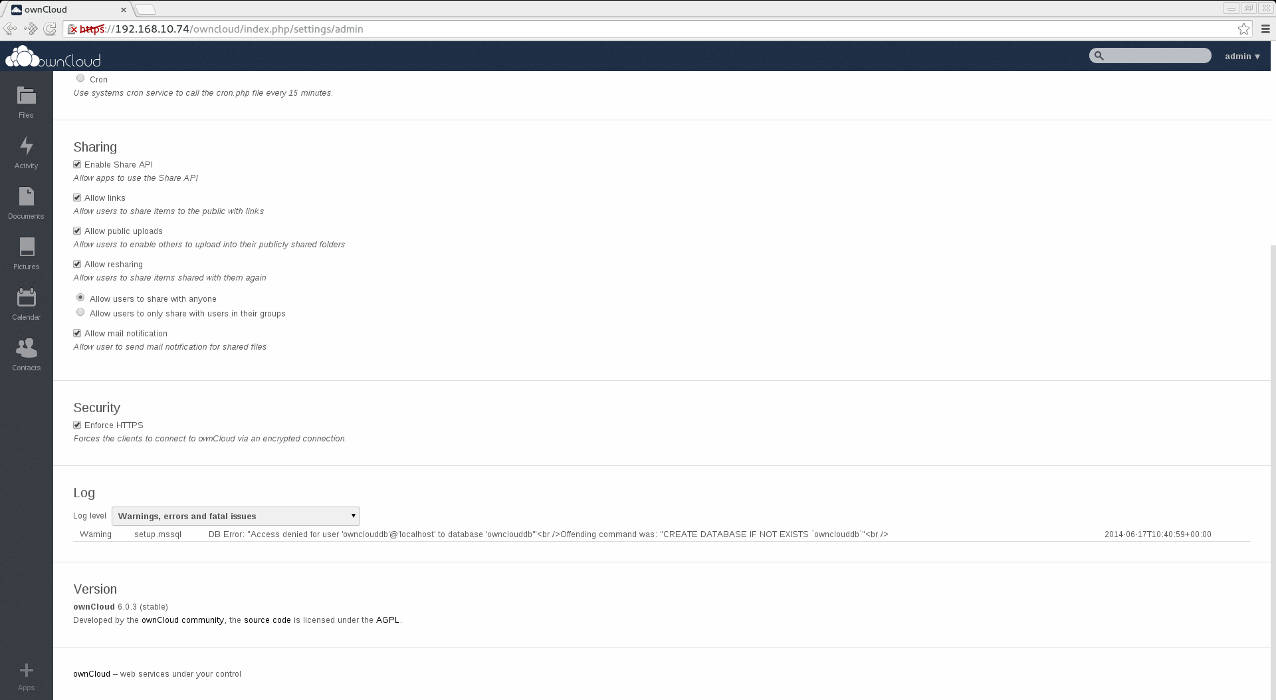
In the “Admin” configuration page scroll down to see the “Security” tab and check the “Enforce HTTPS” to secure your OwnCloud instance.
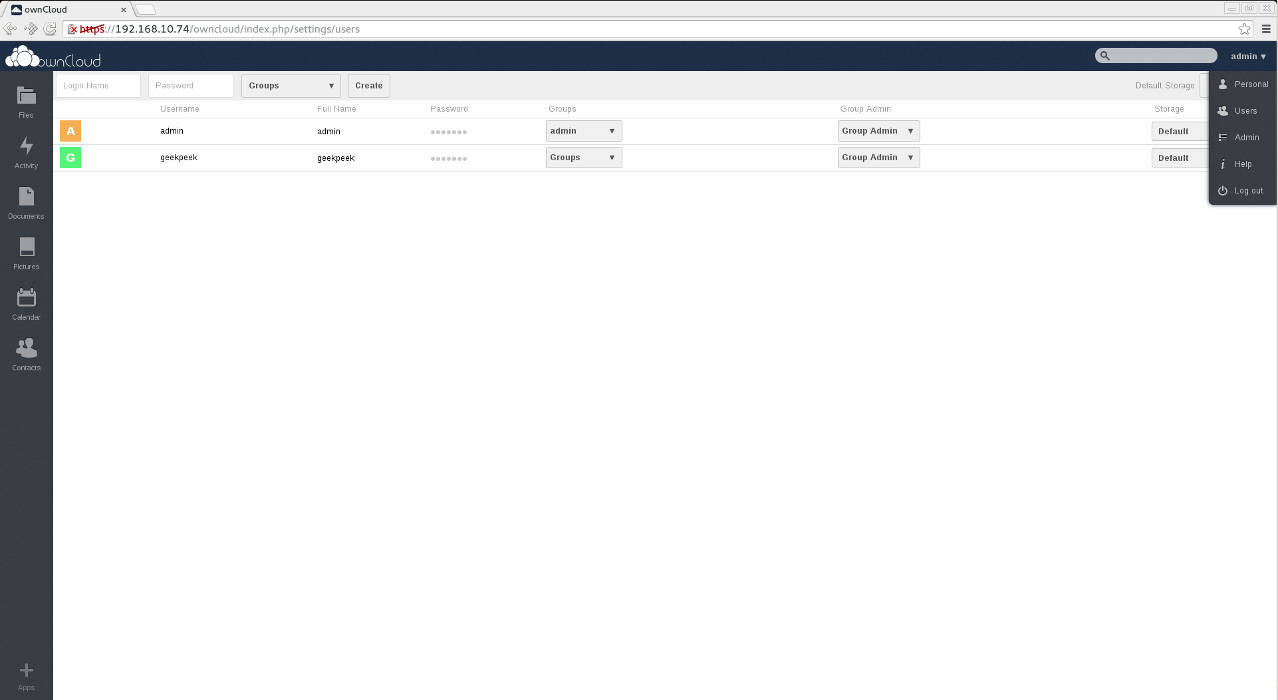
In the right upper corner click on “admin” menu and then select “Users”. Create a new user and assign it a password.
10. Make MySQL, Apache and Postfix Start on Boot
To wrap things up we need to make MySQL, Apache and Postfix start on boot with the following command:
[root@centos1 ~]# chkconfig mysqld on
[root@centos1 ~]# chkconfig httpd on
[root@centos1 ~]# chkconfig postfix on
OwnCloud is now available to access it via the Web URL or you can download and install OwnCloud client which is available for most operating systems and sync your files directly from your computer (just like DropBox!). You can download OwnCloud client HERE.
There are lots of settings you can configure in the OwnCloud “Admin” configuration page which are quite self explanatory and i think you should not have any problems configuring but as far as this How To goes we are finished. I hope you enjoy your instance of OwnCloud as much as i do!