It just so happens, that sometimes you would like to add Windows client to Zenoss monitoring 🙂 . A person would think that this would be quite simple and similar to adding Linux client to Zenoss monitoring, but it is not.
The SNMP Windows client Zenoss monitoring is very limited, in fact i could not get any useful information from my Windows client, so i switched to using WinRM service (Windows Remote Management) for Windows client Zenoss monitoring.
The following guide will provide you with the information on how to add Windows client to Zenoss monitoring by using WinRM service to get the data from Windows client. The Windows client is running Windows Server 2008 R2. To successfully configure WinRM service on Windows 2008 R2 run below commands as an system administrator.
Let’s learn how to add Windows client to Zenoss monitoring!
1. Allow ICMP Through Firewall
Firstly you need to allow incoming ICMP ping request since this is the way Zenoss checks if the system is online.
Go to:
Server Manager -> Configuration -> Windows Firewall with Advanced Security -> Inbound Rules
Do the following:
Enable rule “File and Printer Sharing (Echo Request – ICMPv4-In)”.
2. Manually Configure WinRM Service
Go to:
Start -> Search programs and files -> gpedit.msc -> Computer Configuration -> Administrative Templates -> Windows Components -> Windows Remote Management (WinRM) -> WinRM Service
Configure as follows:
- Allow automatic configuration of listeners -> Enabled -> Under IPv4 filters input “*” without the quotation marks
- Allow Basic authentication -> Enabled
- Allow unencrypted traffic -> Enabled
3. Manually Configure Windows Remote Shell
Go to:
Start -> Search programs and files -> gpedit.msc -> Computer Configuration -> Administrative Templates -> Windows Components -> Windows Remote Shell
Configure as follows:
- Allow Remote Shell Access -> Enabled
- Specify maximum number of processes per Shell -> Enabled -> MaxProcessesPerShell = 2147483647
- Specify maximum number of shells per user -> Enabled -> MaxShellsPerUser = 2147483647
- Specify shell Timeout -> Enabled -> ShellTimeOut = 2147483647
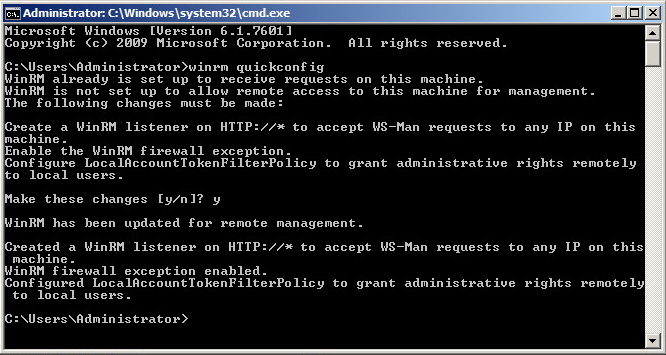
4. Run WinRM Quick Config
Run WinRM quick configuration which adds a firewall exception, allows remote access to the machine for management and starts a WinRM HTTP listener.
Go to:
Start -> Search programs and files -> cmd
Run “winrm quickconfig” and press “y” as follows.
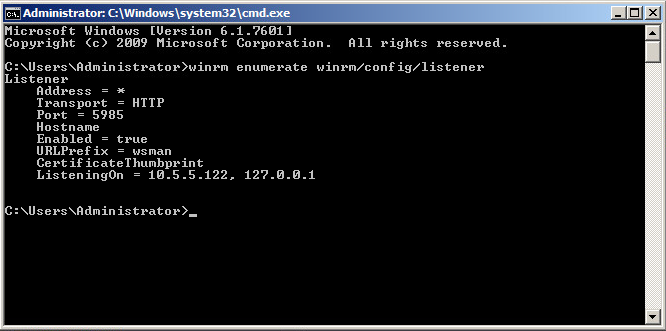
5. Check WinRM HTTP Listener is Running
Go to:
Start -> Search programs and files -> cmd
Run “winrm enumerate winrm/config/listener” to make sure it is running and accepting connections as follows.
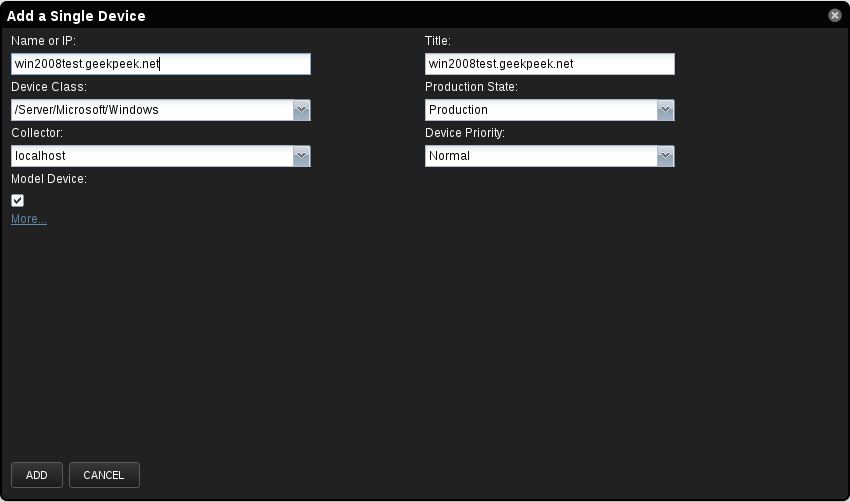
6. Add Windows Client to Zenoss
Go to Zenoss web GUI to the following page:
Infrastructure -> Devices -> Details

Under “Configuration Properties” enter “zWinRMUser” and “zWinRMPassword” details. This user should have administrative rights on Windows Zenoss client machine.

Next on the Zenoss Infrastructure page click “Add a Single Device”. Enter the Windows machine name or IP address. Make sure to choose the device class “/Server/Microsoft/Windows”!
Voila, the Windows machine was successfully added to your Zenoss.
The Windows machine should be modeled automatically – the filesystems and services should appear along with interfaces and processors. If you are worried about the security, you can read more HERE how to reconfigure WinRM to work over HTTPS.
This is the end of my “Add Windows Client to Zenoss Monitoring” guide, wish you all happy Zenoss monitoring!